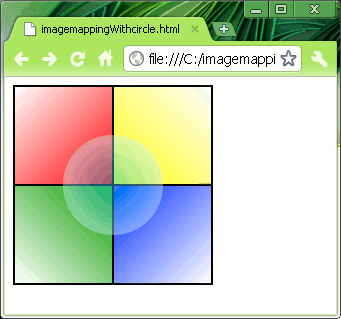
We have this image divided in to showing 4 color quadrants and we want to link each quadrant to individual pages.
Lets create an image map for this picture.
The tag we need is:
<MAP> </MAP>
Attributes:
Name: The name of the map.
Along with <MAP> we also need the tag:
<AREA> </AREA>
Attributes:
Shape: The shape of the hot-spot we need. Ex: Rect, Plygon, Circle.
Coords: The coordinates for the shape, which depends on the shape.
Href: The address of the page we want the link to.
Alt: The tool tip for the link.
Lets see how the map looks like for our example.
<HTML>
 <BODY>
  <Image Src = "imageMapping.gif" UseMap = "#MyMap">
  <Map name = "MyMap">
  <Area Shape = "Rect" Coords = "0,0,100,100" href = "Red.html" Alt = "Red">
  <Area Shape = "Rect" Coords = "100,0,200,100" href = "Yellow.html" Alt = "Yellow">
  <Area Shape = "Rect" Coords = "0,100,100,200" href = "Green.html" Alt = "Green">
  <Area Shape = "Rect" Coords = "100,100,200,200" href = "Blue.html" Alt = "Blue">
  </Map>
 </BODY>
</HTML>
You can notice how the 'Coords' works. In this example, its Left, Top, Right and Bottom (Image is 200 X 200). If you remember in the Image Tag post we saw a "UseMap" attribute. This is the attribute we use to attach an image map to an image with a '#' preceding the name of the map.
So each of the color box is now connected to an individual web page.
Image Mapping with Circle:
This example shows image mapping with shape as circle. This is easy. Circle takes center and a radius. In this example 100,100 is the X,Y coordinate for the center (of the image) and 50 as the radius. I have highlighted the area for better understanding.
<HTML>
 <BODY>
  <Image Src = "imageMappingWithCircle.gif" UseMap = "#MyMap">
  <Map name = "MyMap">
  <area shape="circle" coords="100,100,50" href="Circle.html" alt="Circle" />
  </Map>
 </BODY>
</HTML>
WebPage:


No comments:
Post a Comment
Please leave a comment if you have anything to say or have something to ask.. I will do my best to answer..